In our previous tutorial, we learned how to extract keyframes audio files. In this short tutorial we will learn how to move the slider controls to the main composition.
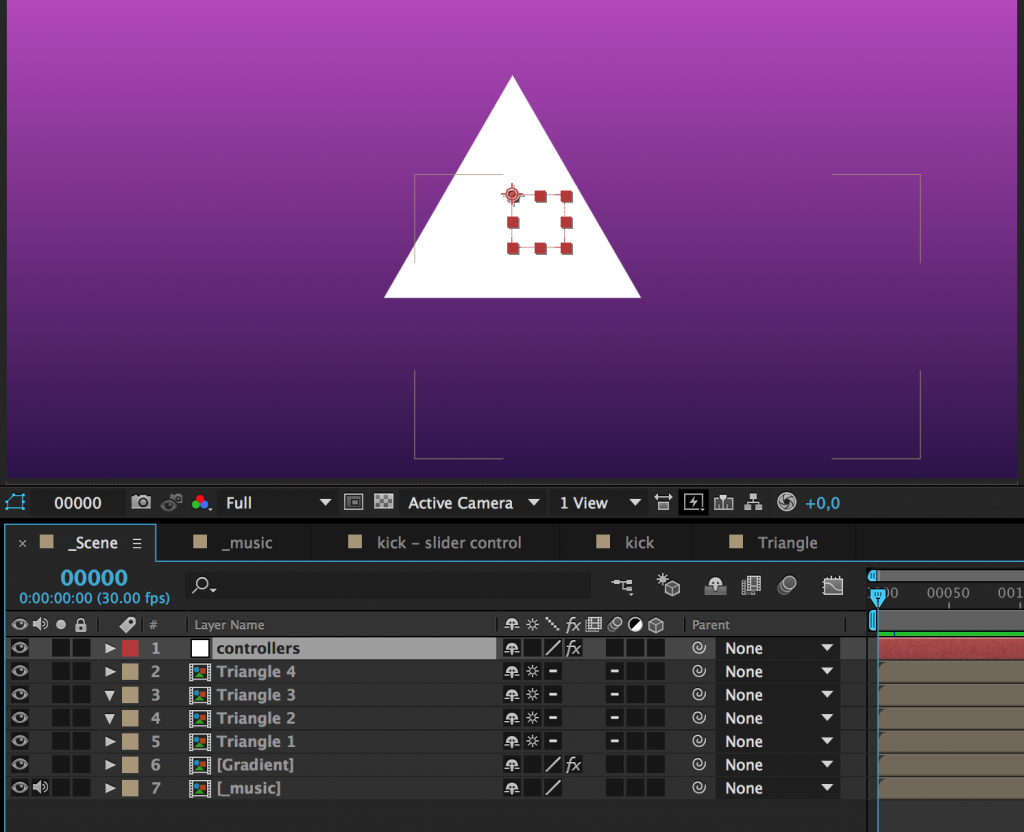
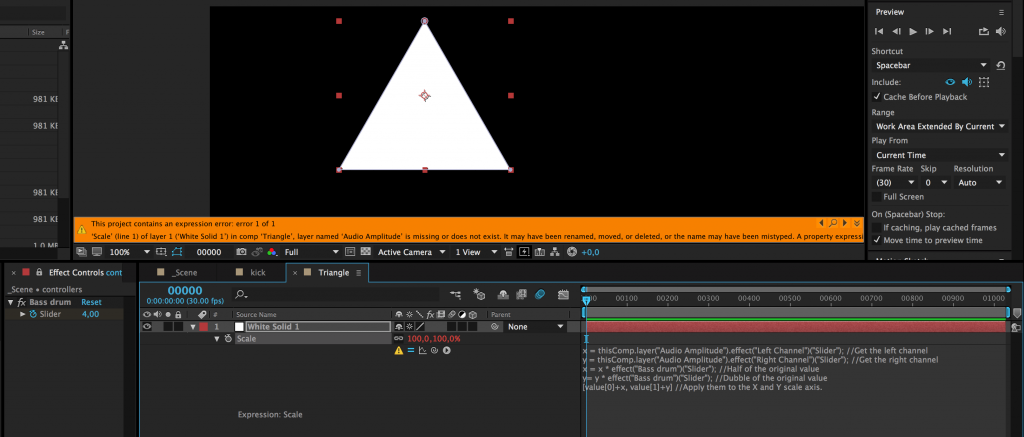
4. Make/select a comp for the object you want to control. (In this example we will only scale it, but you could move it, change opacity, tint color or change other effects based on the audio keyframes). In this example I created a simple triangle that I want to scale to the bass drum.
5. Open your new comp, click on your graphic and press s for scale, enable expressions by shift-click the stopwatch and paste the following code from our previous tutorial:
x = thisComp.layer("Audio Amplitude").effect("Left Channel")("Slider"); //Get the left channel
y = thisComp.layer("Audio Amplitude").effect("Right Channel")("Slider"); //Get the right channel
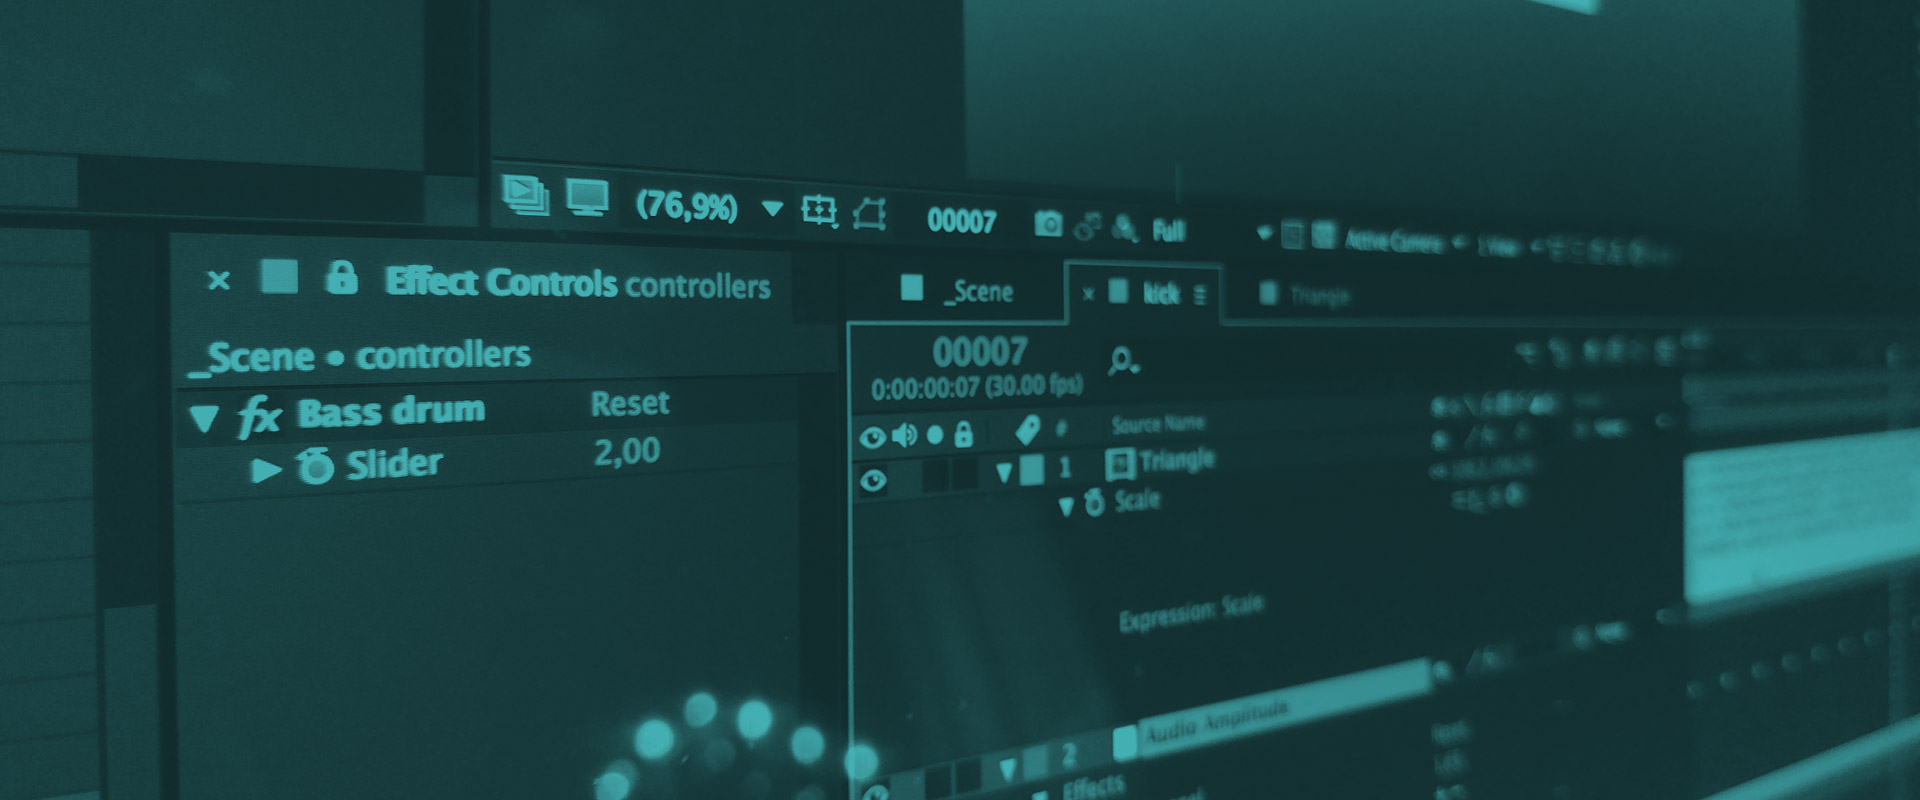
x = x * effect("Bass drum")("Slider"); //Multiply the value with a slider control
y= y * effect("Bass drum")("Slider"); //Multiply the value with a slider control
[value[0]+x, value[1]+y] //Apply them to the X and Y scale axis.
x = thisComp.layer("Audio Amplitude").effect("Left Channel")("Slider"); //Get the left channel
To fix this we have to connect the expression with our previous comp kick where we have our audio keyframes in a layer called Audio Amplitude.
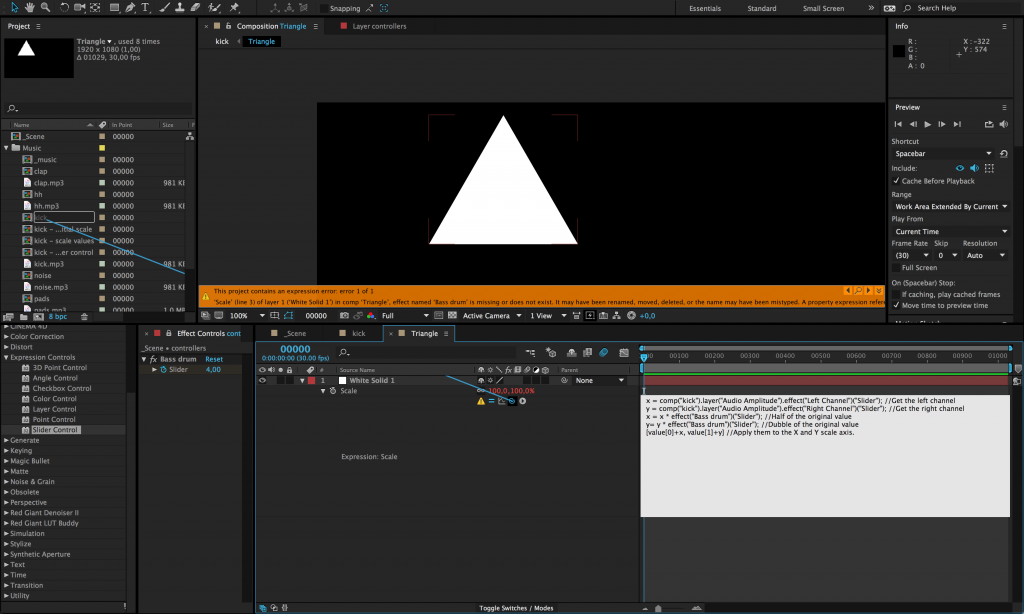
Now we will instead of thisComp have comp(“kick”). This is the way to find a specific composition in our project. Make shure the name is unique so we don’t get some wierd name conflicts. One cool thing with After Effect is that if you later change the name of the composition, it will also update the name in all expression used in the project.
But we will still have some errors. Now the error says that the effect Bass drum is missing. Here is where we want to reference our slide controller in the main comp. So lets do that:
x = comp("kick").layer("Audio Amplitude").effect("Left Channel")("Slider"); //Get the left channel
y = comp("kick").layer("Audio Amplitude").effect("Right Channel")("Slider"); //Get the right channel
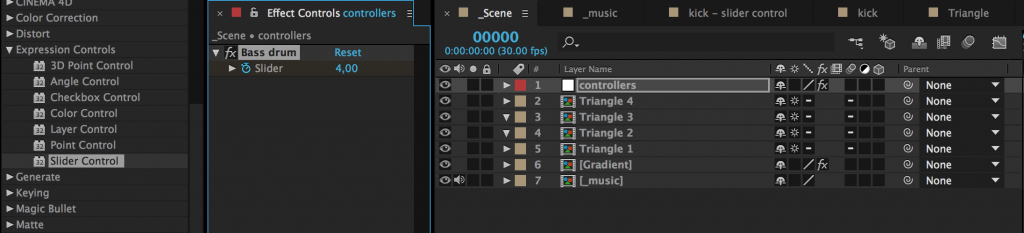
x = x * comp("_Scene").layer("controllers").effect("Bass drum")("Slider"); //Multiply the value with a slider control
y= y * comp("_Scene").layer("controllers").effect("Bass drum")("Slider"); //Multiply the value with a slider control
[value[0]+x, value[1]+y] //Apply them to the X and Y scale axis.
I hope you learned something from this tutorial, and please don’t hesitate to write a comment if you wonder something, or send me a tweet @jonassandstedt.