During the making of the music video Let It Carry You by José González, I needed a way to animate a lot of objects and sync them to music. I would later handle of the file to another person that wasn’t familiar with After Effect’s expressions, so I needed a simple UI to control parameters. Here’s how I did it.
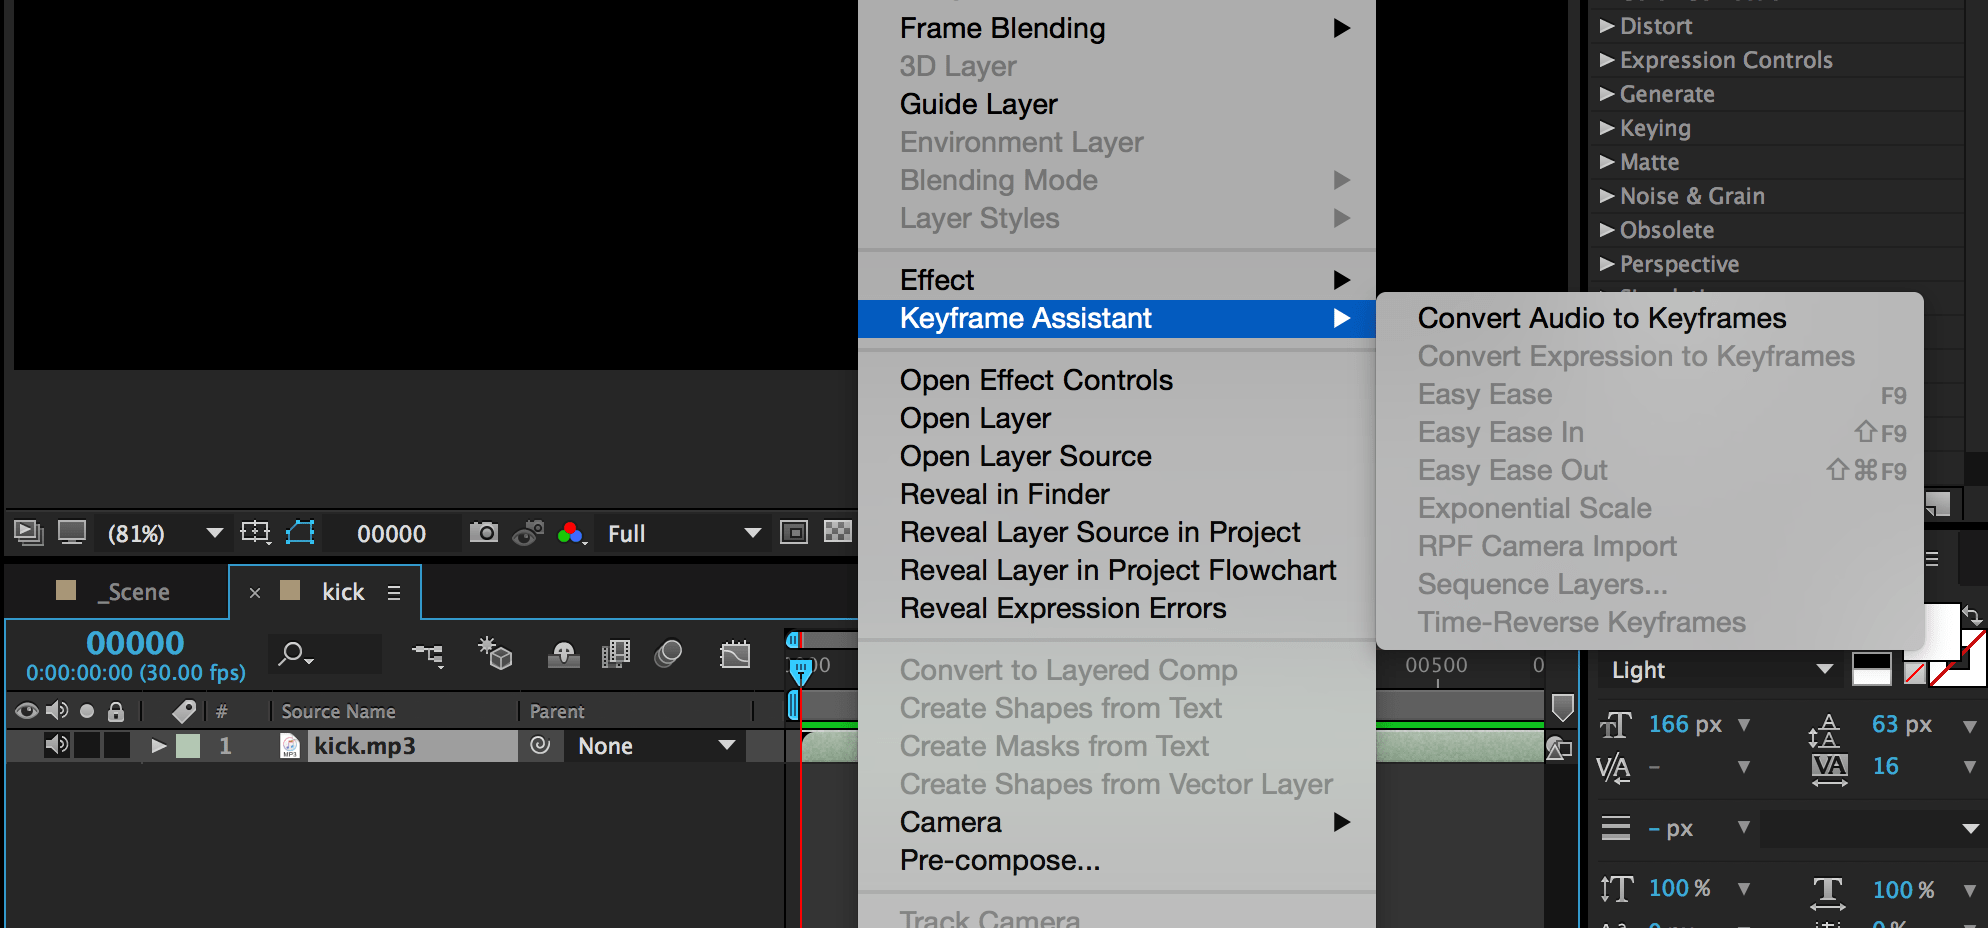
Convert audio to keyframes
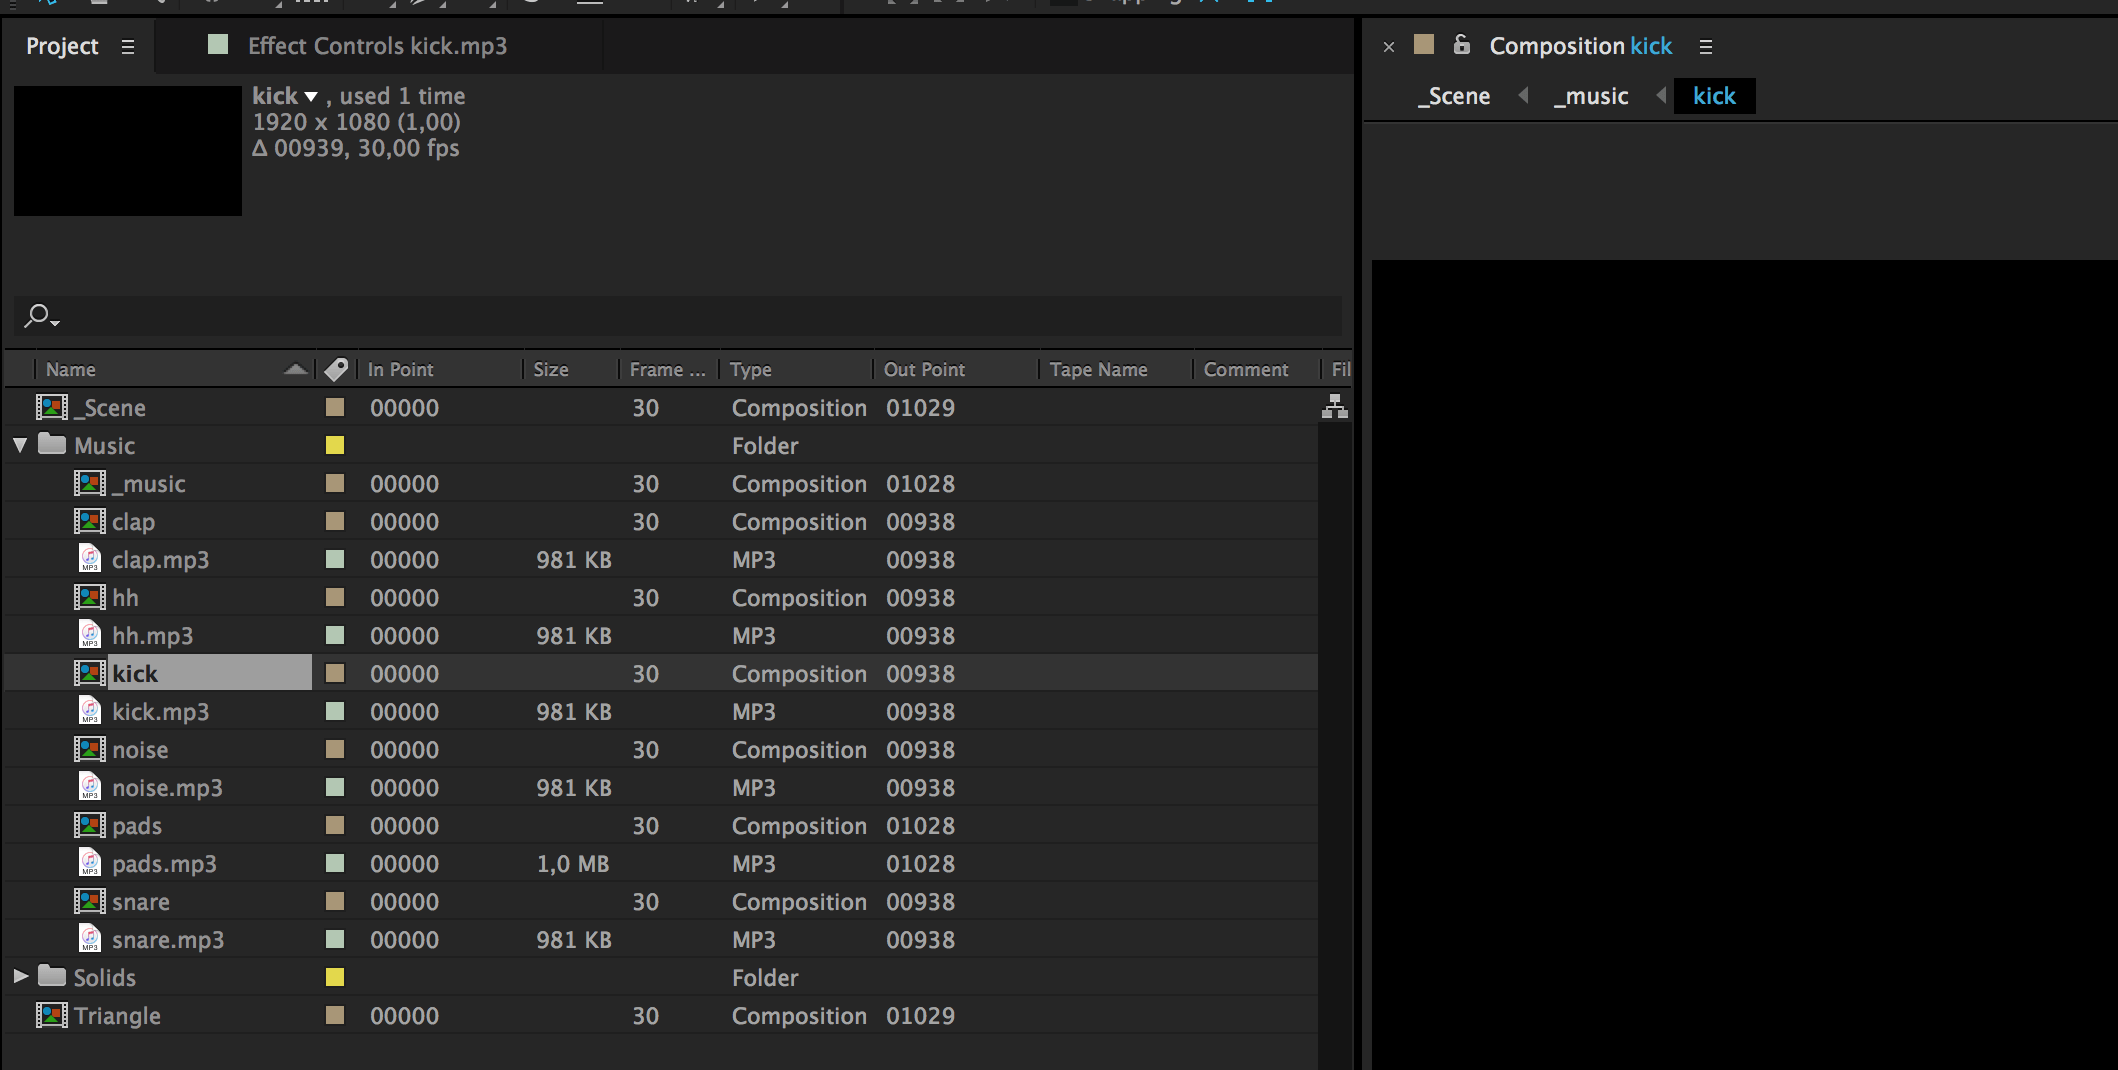
For the best result, you need to have your music or sounds in separate files, like guitar in one track, bass drum in another track and so on. If you want you can download the sample files in this tutorial here.
Connect to different values
Start with creating the object you want to trigger. We could place this object in another comp, but to keep it simple we’ll putt it in the same comp as the sound. Make sure the graphics anchor point is in center (or the point where you want the graphic to be scaled from). Press Y and drag the circle that looks like a aim to move the anchor point.
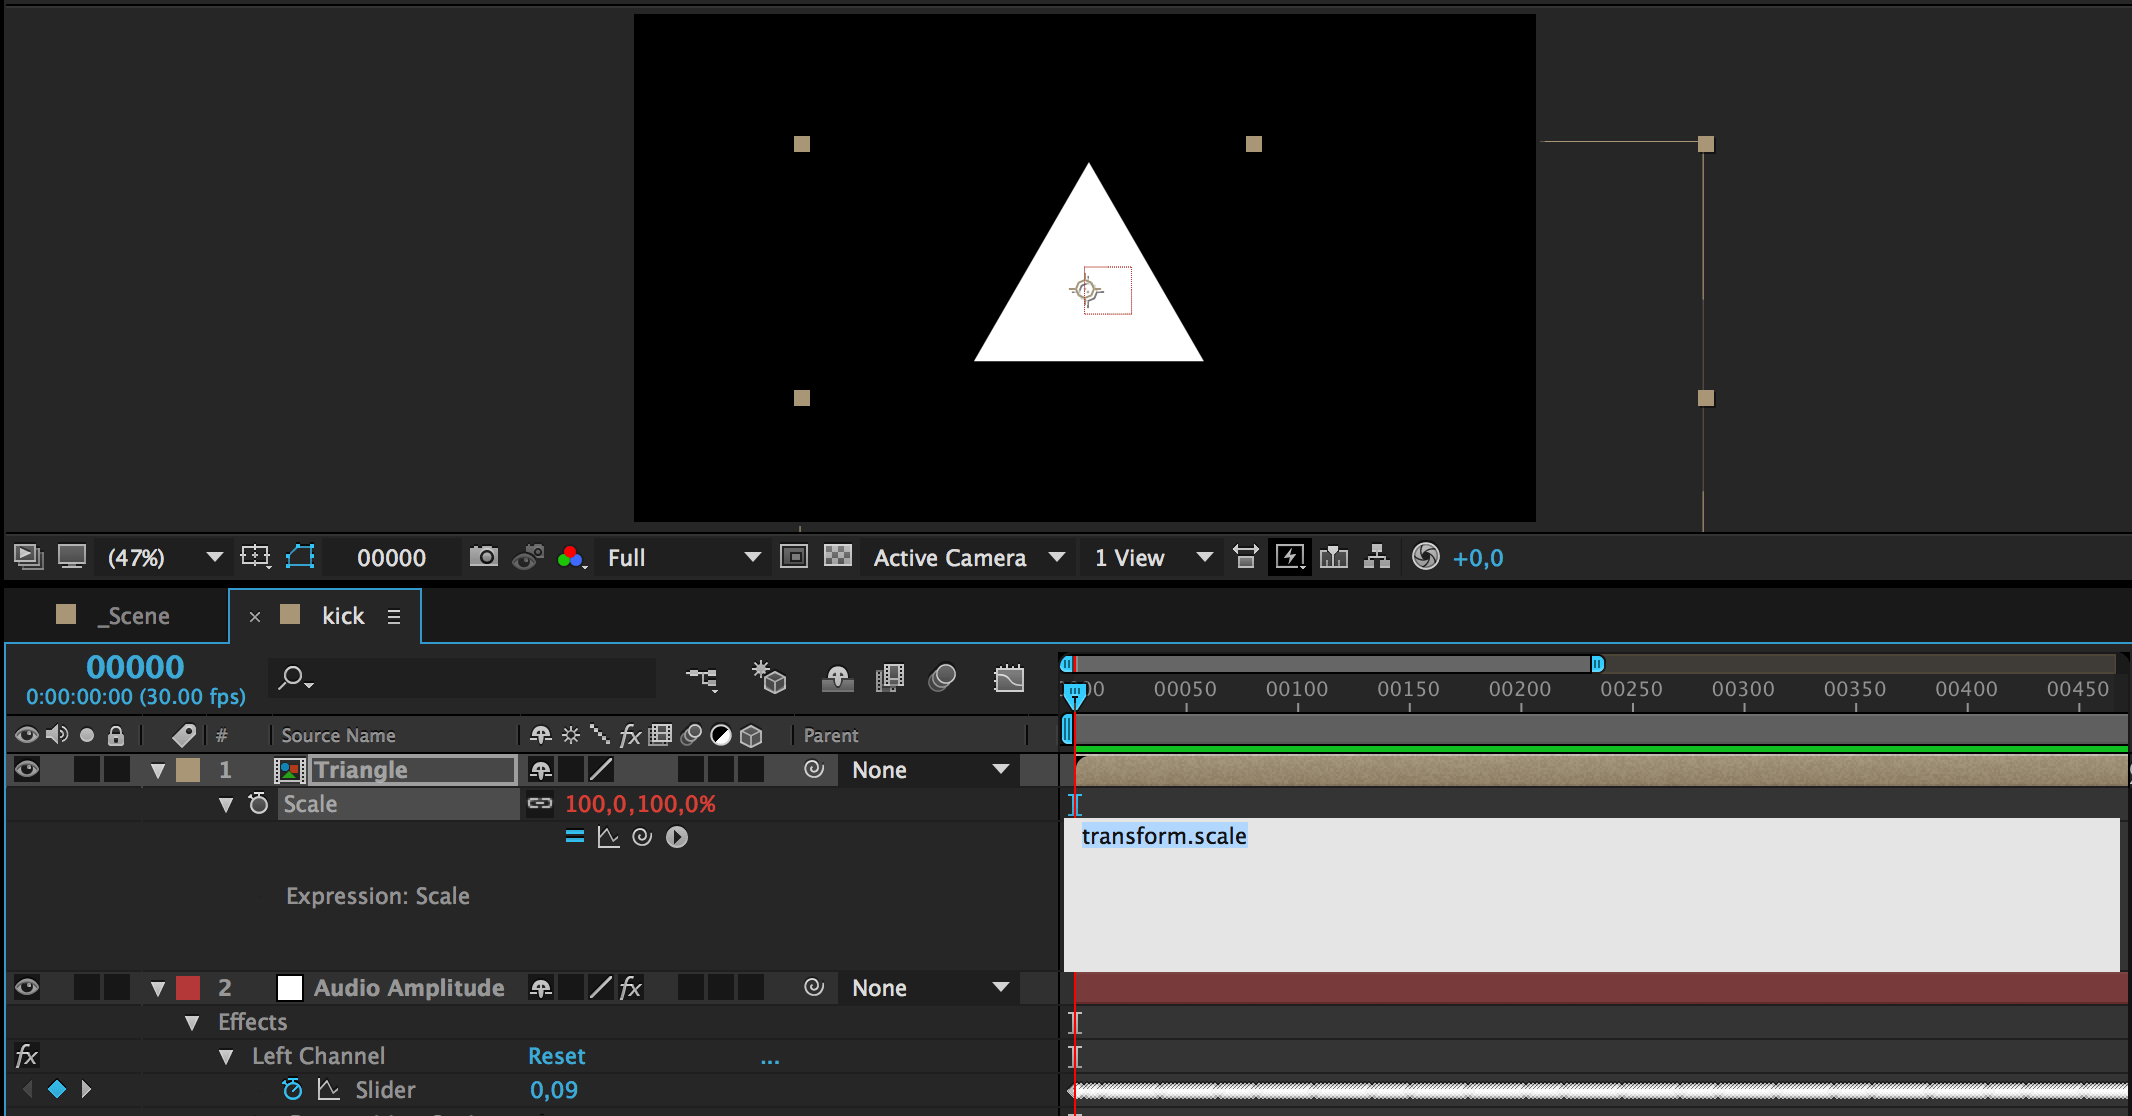

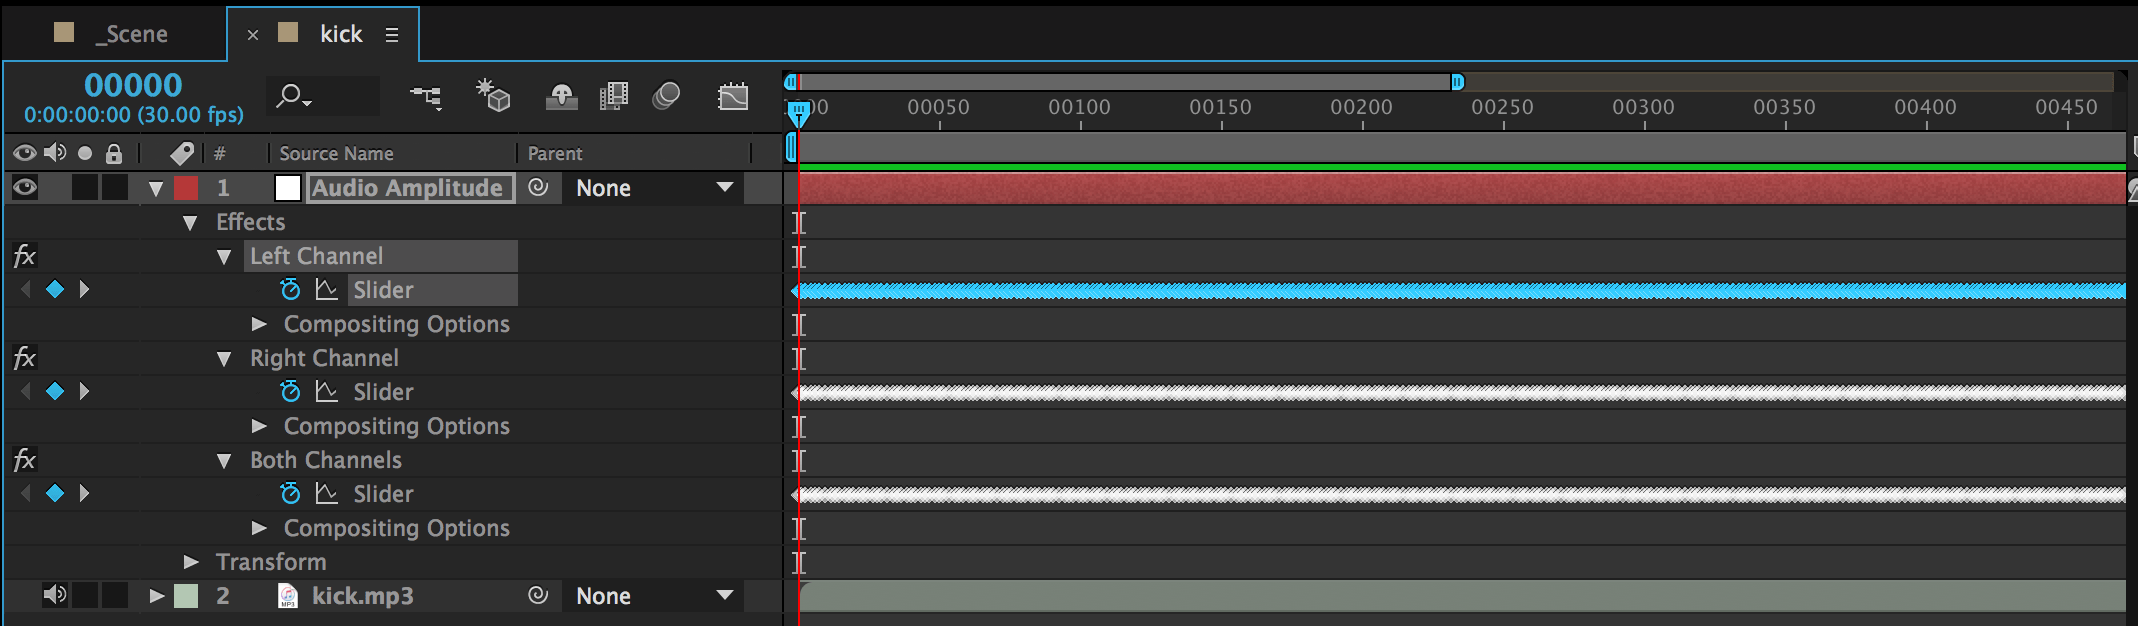
x = thisComp.layer("Audio Amplitude").effect("Left Channel")("Slider"); //Get the left channel
y = thisComp.layer("Audio Amplitude").effect("Right Channel")("Slider"); //Get the right channel
[x, y] //Apply them to the X and Y scale axis.
This is what it looks like with a kick drum connected to the triangle’s scale property. As you see, the triangle disappear completely when there is silence in the sound, maybe not exactly as we wanted. And if we would have scaled the layer before, it would now be reset.
Adjust the output from the audio sliders
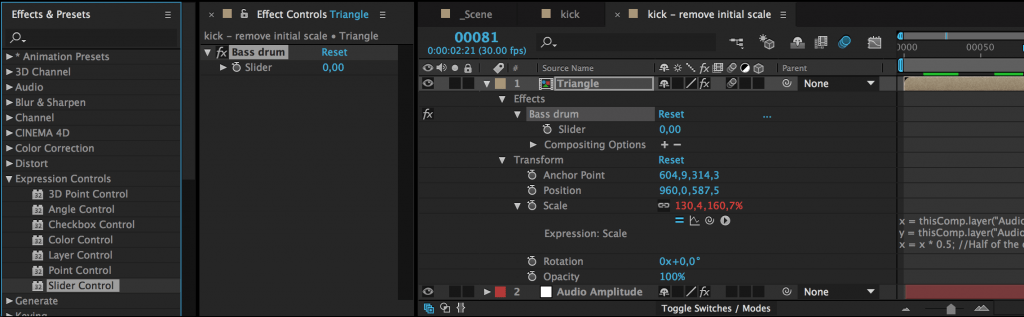
If we instead want to start the animation from the original value, we’ll have to add some extra expressions.
Open up the expression field for scale in the triangle-comp, and copy this:
x = thisComp.layer("Audio Amplitude").effect("Left Channel")("Slider"); //Get the left channel
y = thisComp.layer("Audio Amplitude").effect("Right Channel")("Slider"); //Get the right channel
[value[0]+x, value[1]+y] //Apply them to the X and Y scale axis.
What we added here is the
[value[0]+x, value[1]+y]
The value is a predefined array that contains the original values of the scale properties. Eg if we had set our scale values to scale X: 10 and scale Y: 7, then value would be value[10, 7]. The first value ( value[0] ) is the x-axis and value[1] is the y-axis. So when we write value[0]+x, we say that –Take this layer’s scale-x value and add the value of the variable x to it.
We could also controll how much of the audio-sliders values we would like to add to the layer by multiply the variables x and y. To do this we could just do
x = x * 0.5
This will cut the x value in half.
The complete code:
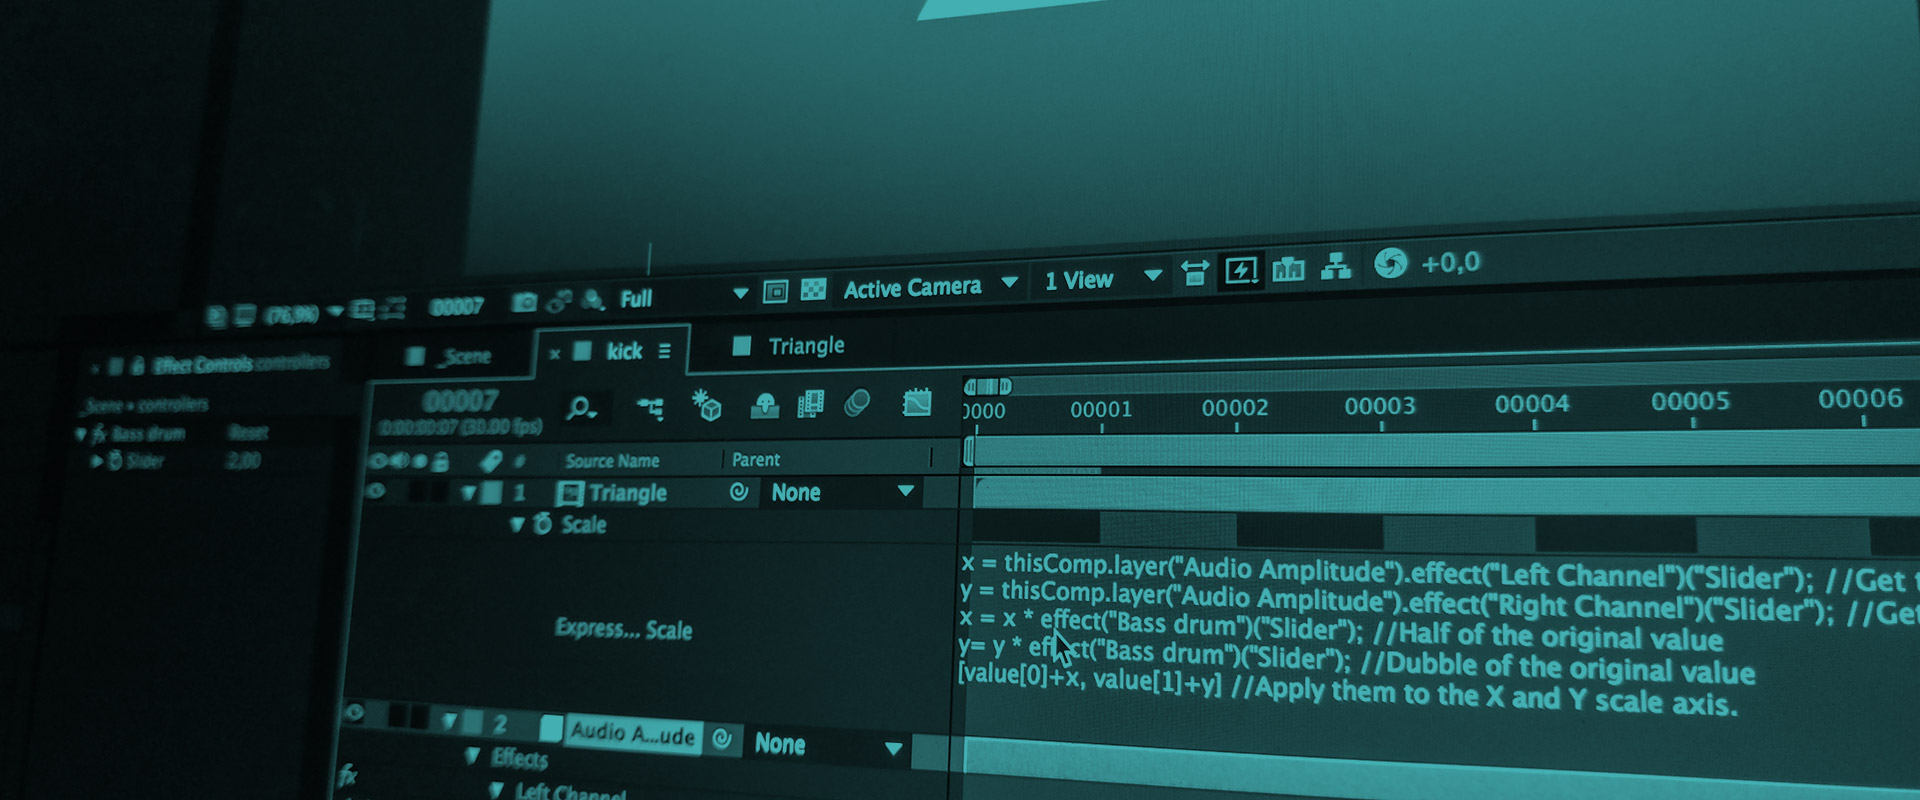
x = thisComp.layer("Audio Amplitude").effect("Left Channel")("Slider"); //Get the left channel
y = thisComp.layer("Audio Amplitude").effect("Right Channel")("Slider"); //Get the right channel
x = x * 0.5; //Half of the original value
y= y * 2; //Dubble of the original value
[value[0]+x, value[1]+y] //Apply them to the X and Y scale axis.
Adjust the output from the audio sliders with slider controlls
A more user friendly way of controlling the amount of effect from the audio sliders is to add a slider controll, instead of multiplying the values.
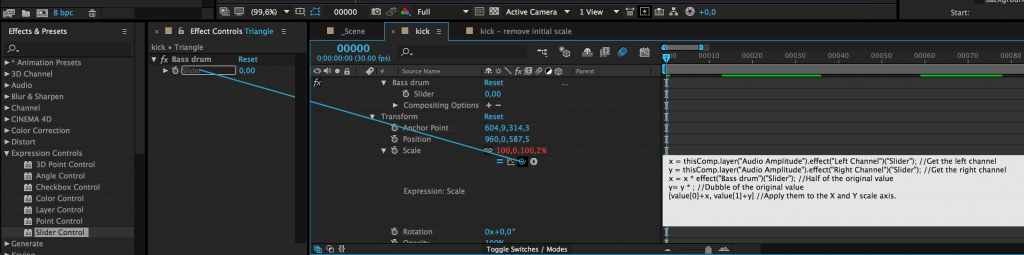
x = thisComp.layer("Audio Amplitude").effect("Left Channel")("Slider"); //Get the left channel
y = thisComp.layer("Audio Amplitude").effect("Right Channel")("Slider"); //Get the right channel
x = x * effect("Bass drum")("Slider"); //Multiply the value with a slider control
y= y * effect("Bass drum")("Slider"); //Multiply the value with a slider control
[value[0]+x, value[1]+y] //Apply them to the X and Y scale axis.
Now you can adjust the value of the effect with the slider control, and even animate the amount:
And that’s it! Something you could do to make it easier to work with, is to move the slider controls to the main comp so you can control a lot of different objects in the same place. Another thing you may want to do, is to smooth out the keyframes generated in the audio with the smoother effect. But that will be another tutorial.
I hope you learned something from this tutorial, and please don’t hesitate to write a comment if you wonder something, or send me a tweet @jonassandstedt.
If you don’t wanna write any code, I can recommend bying Trapcode Sound Keys instead 🙂 https://www.redgiant.com/user-guide/trapcode-sound-keys/